Velvet Nails: Luxurious and Textured Mani To Try At Home

In the world of instagrammable nail art, there’s always a new trend that captures everyone’s attention. This fall and winter, one of the trends are the velvet nails.
Is it because the velvet effect goes so well with the pumpkin spice hues? Or is it that it looks a bit like a fluffy blanket? Velvet nails can also look either very 70s or very grandmacore which can add a touch of luxury to our fingertips.
Unraveling the Velvet Nails Trend:
This trend actually came from TikTok, as a lot of good stuff does, and the original design was had that silvery shifting effect as when you look into a cat’s eye.
This is the OG velvet nail version. Photo from buro247.ru
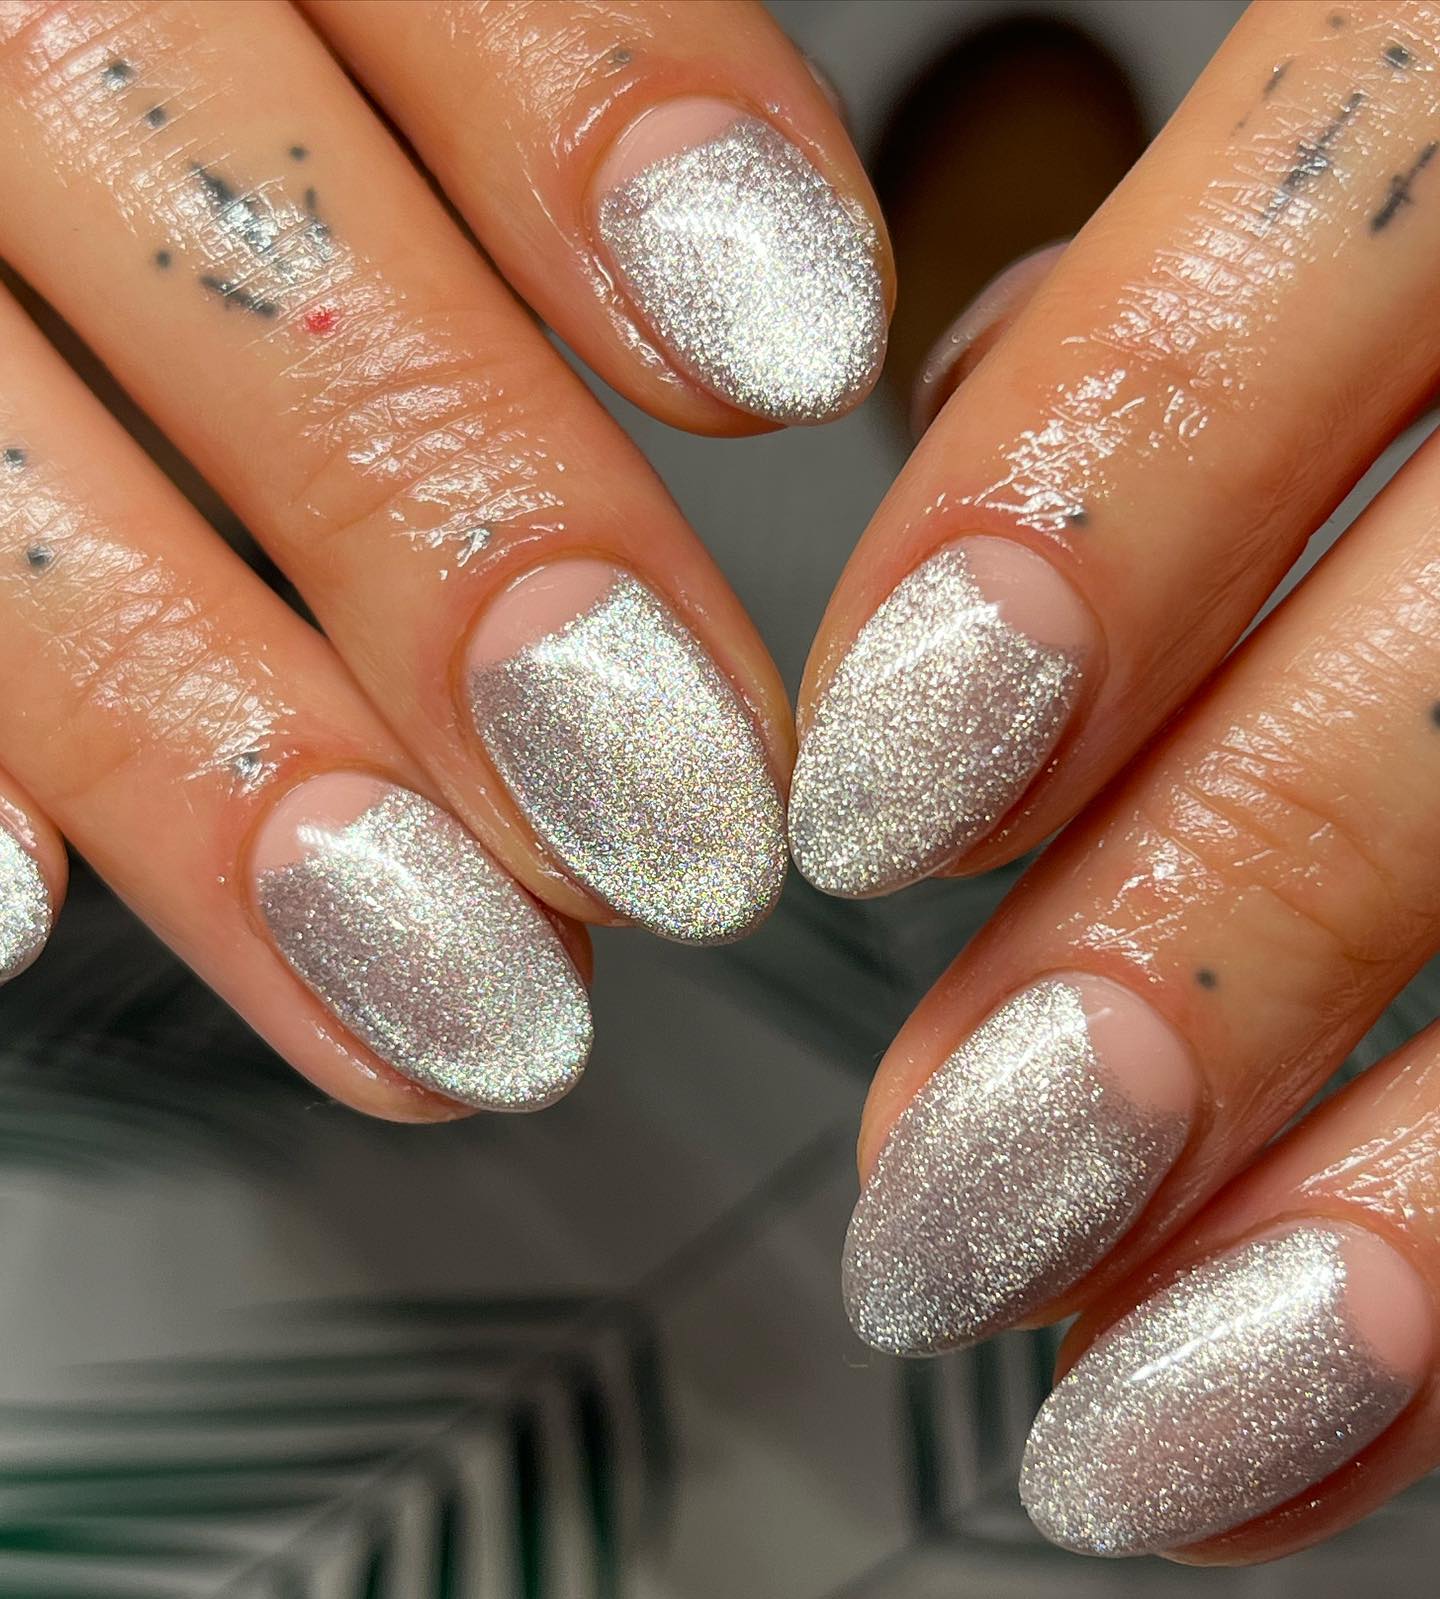
Velvet nails are slightly textured nails that have a soft, plush appearance reminiscent of the namesake fabric. You can think of it as of a really soft version of holo glitter.
Mostly you will see velvet nails on videos posted on Insta or Tiktok which makes sense - the velvety effect looks best when your hands are moving.
Either way, here is the mesmerizing world of velvet nails, a manicure trend that brings the soft texture of velvet fabric to your fingertips.
In this feature, we’ll explore the allure of velvet nails and provide a step-by-step guide on how to achieve this luxurious look from the comfort of your own home. Get ready to transform your nails into a velvety work of art.
5 Best Velvet Nail Looks from Fall 2023
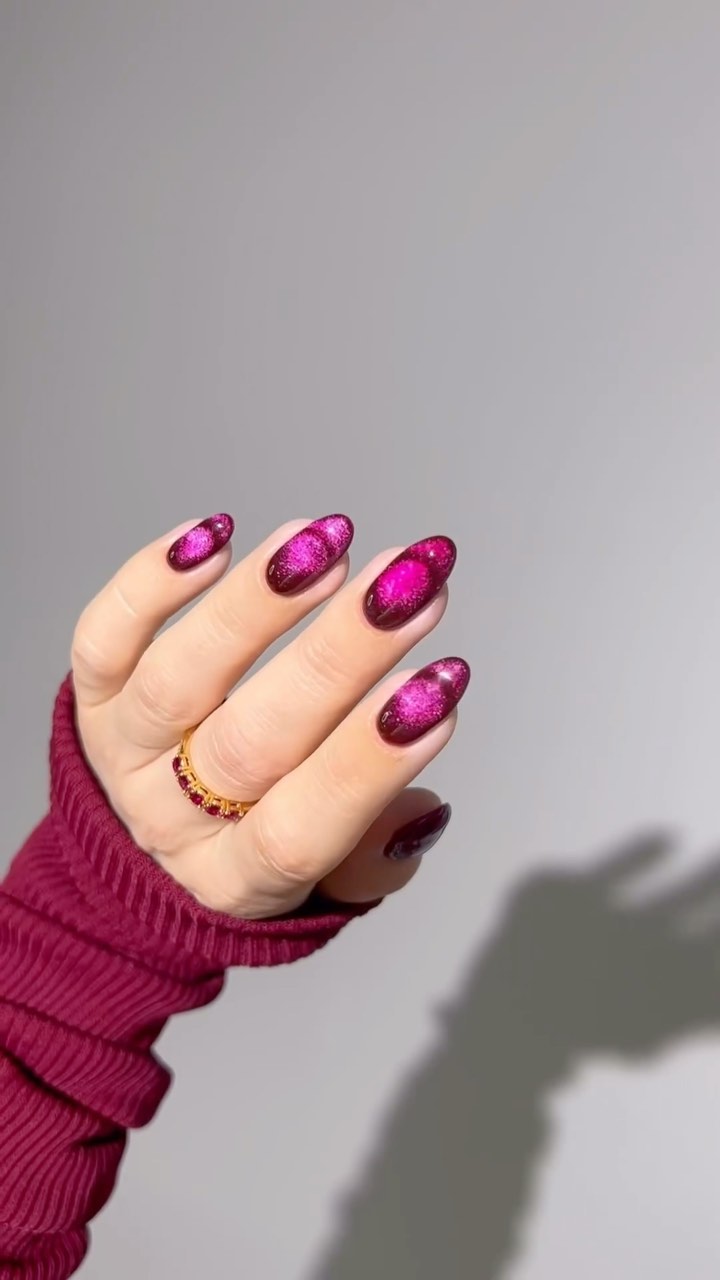
1. Psychedelic velvet effect from @heygreatnails
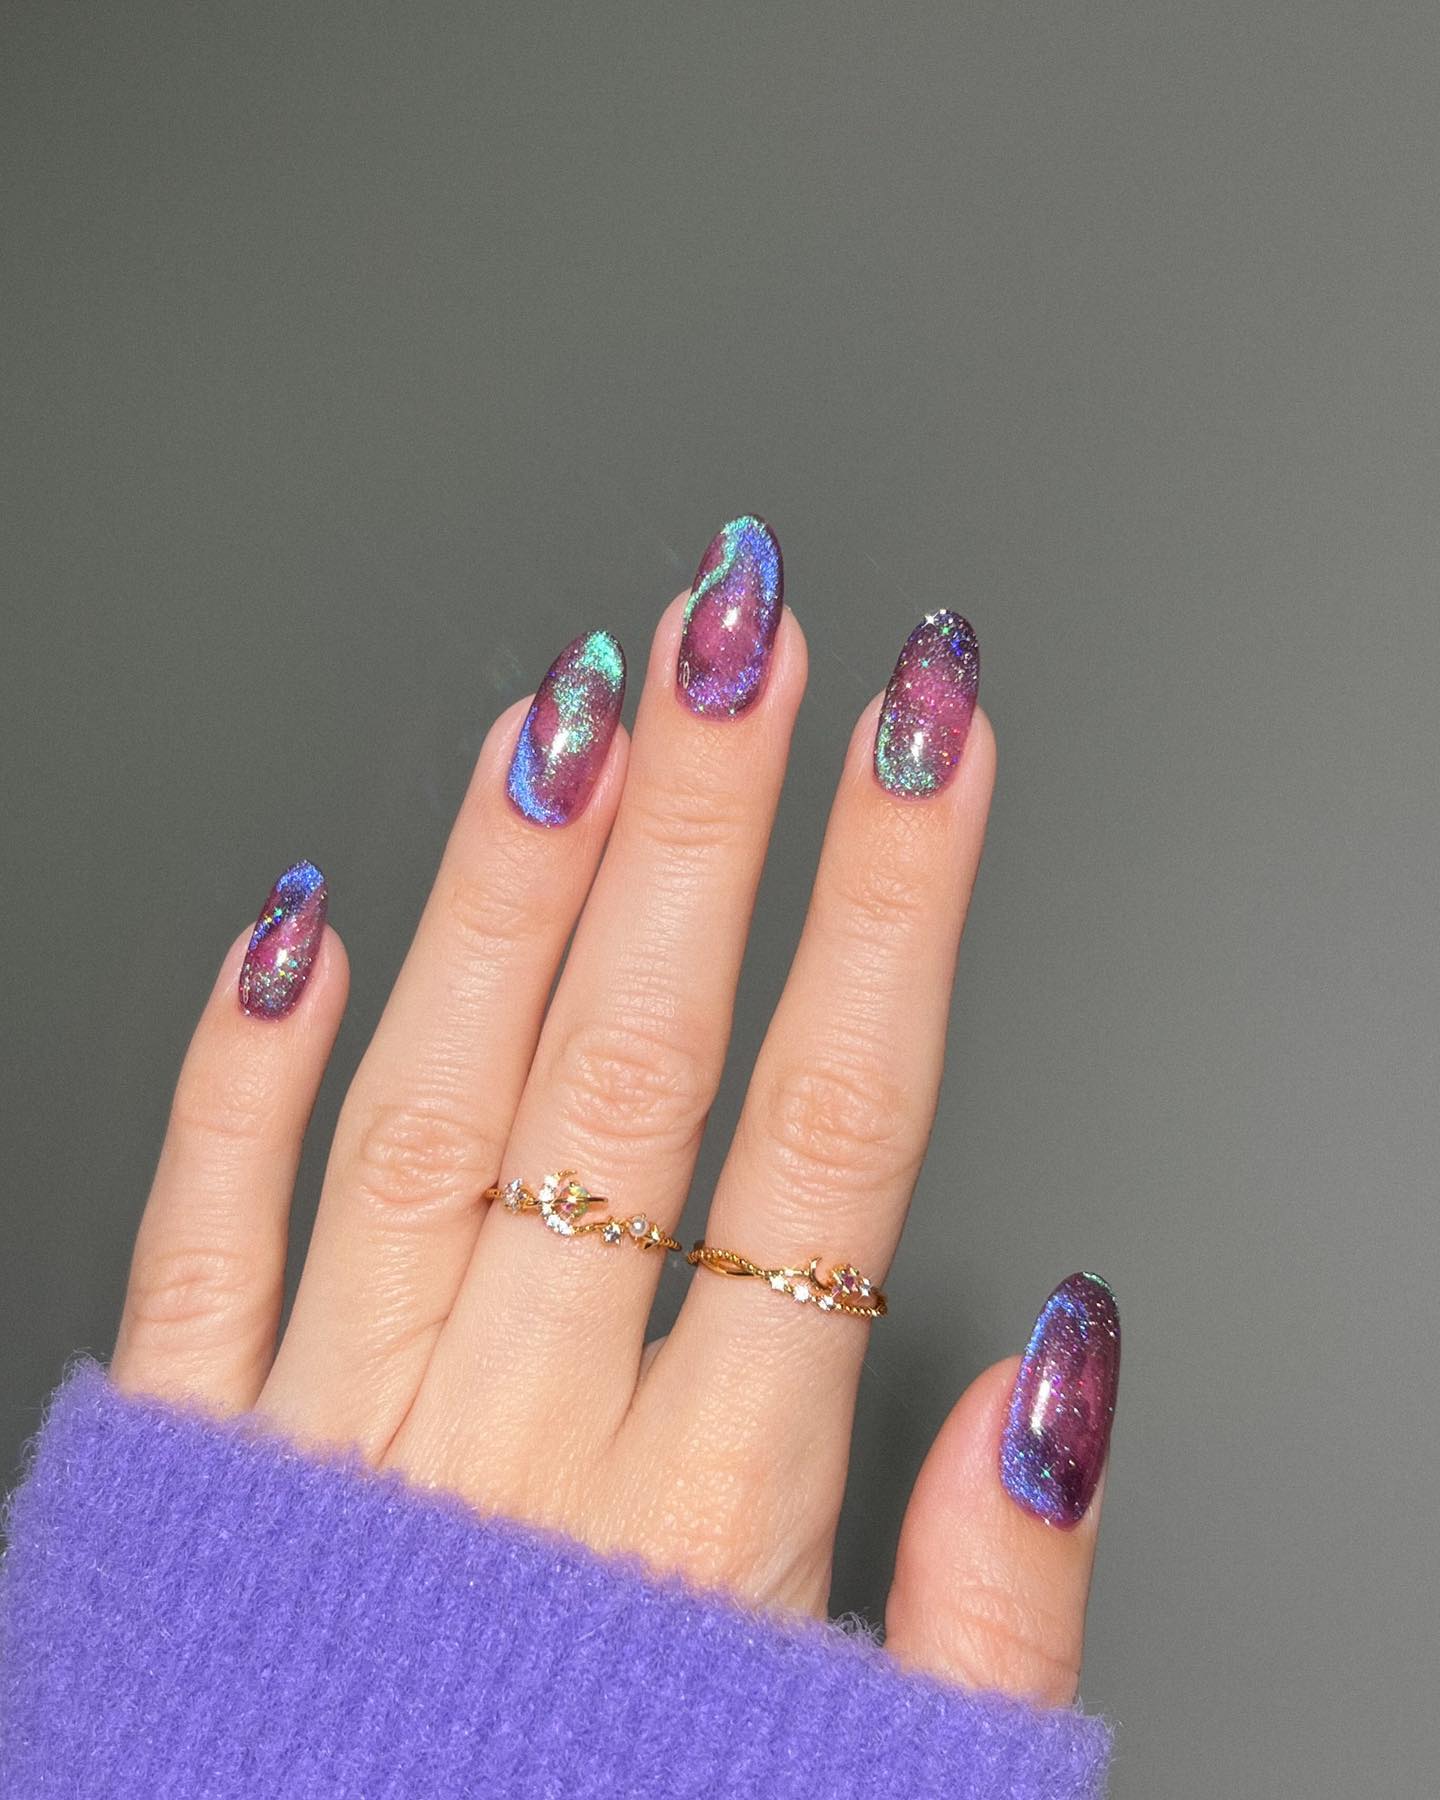
2. Cat eye velvet nails with a halfmoon by @julyninetysix
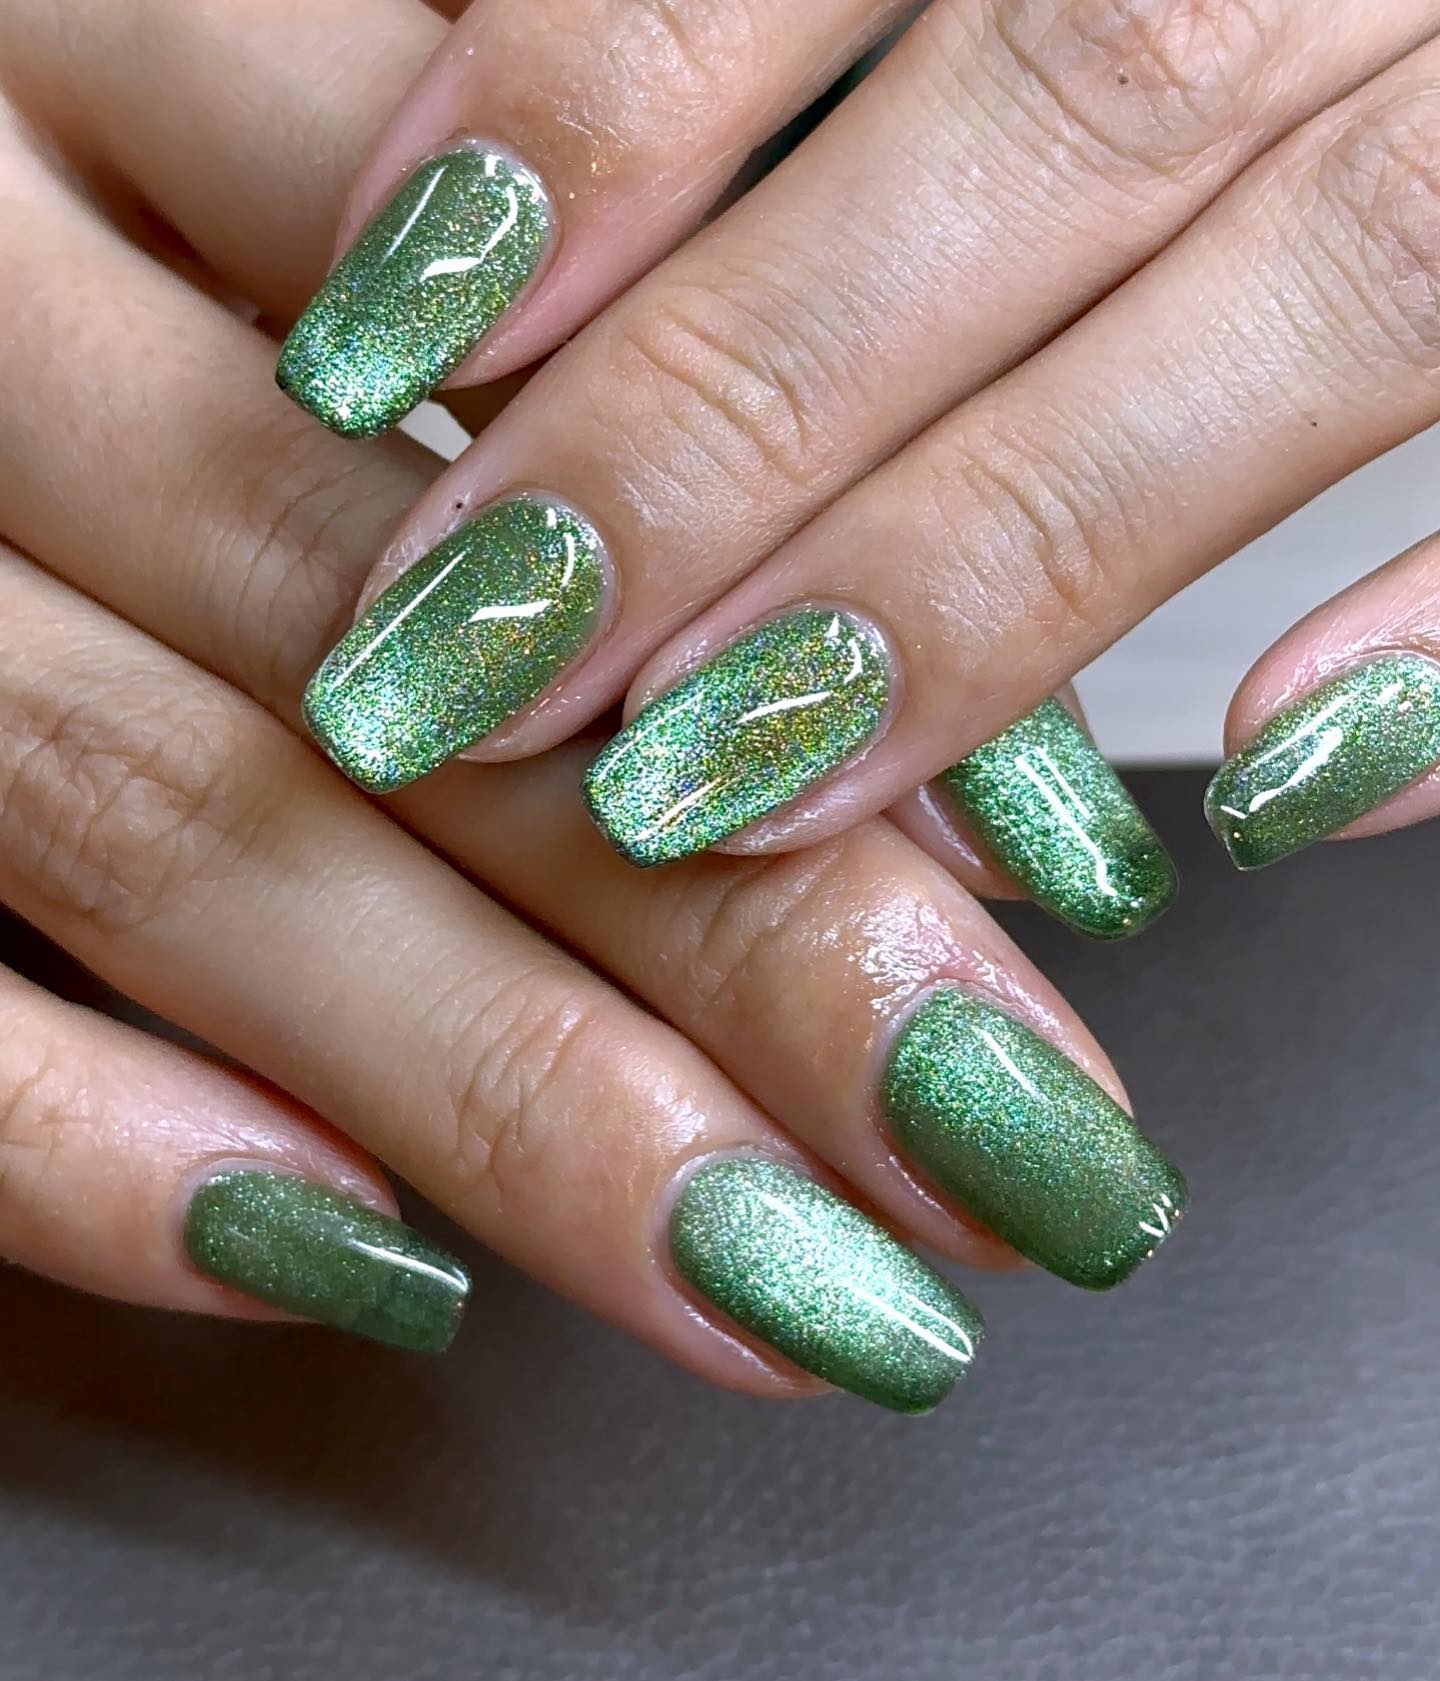
3. In green, the velvet nails look so 70s. By @la_nianails
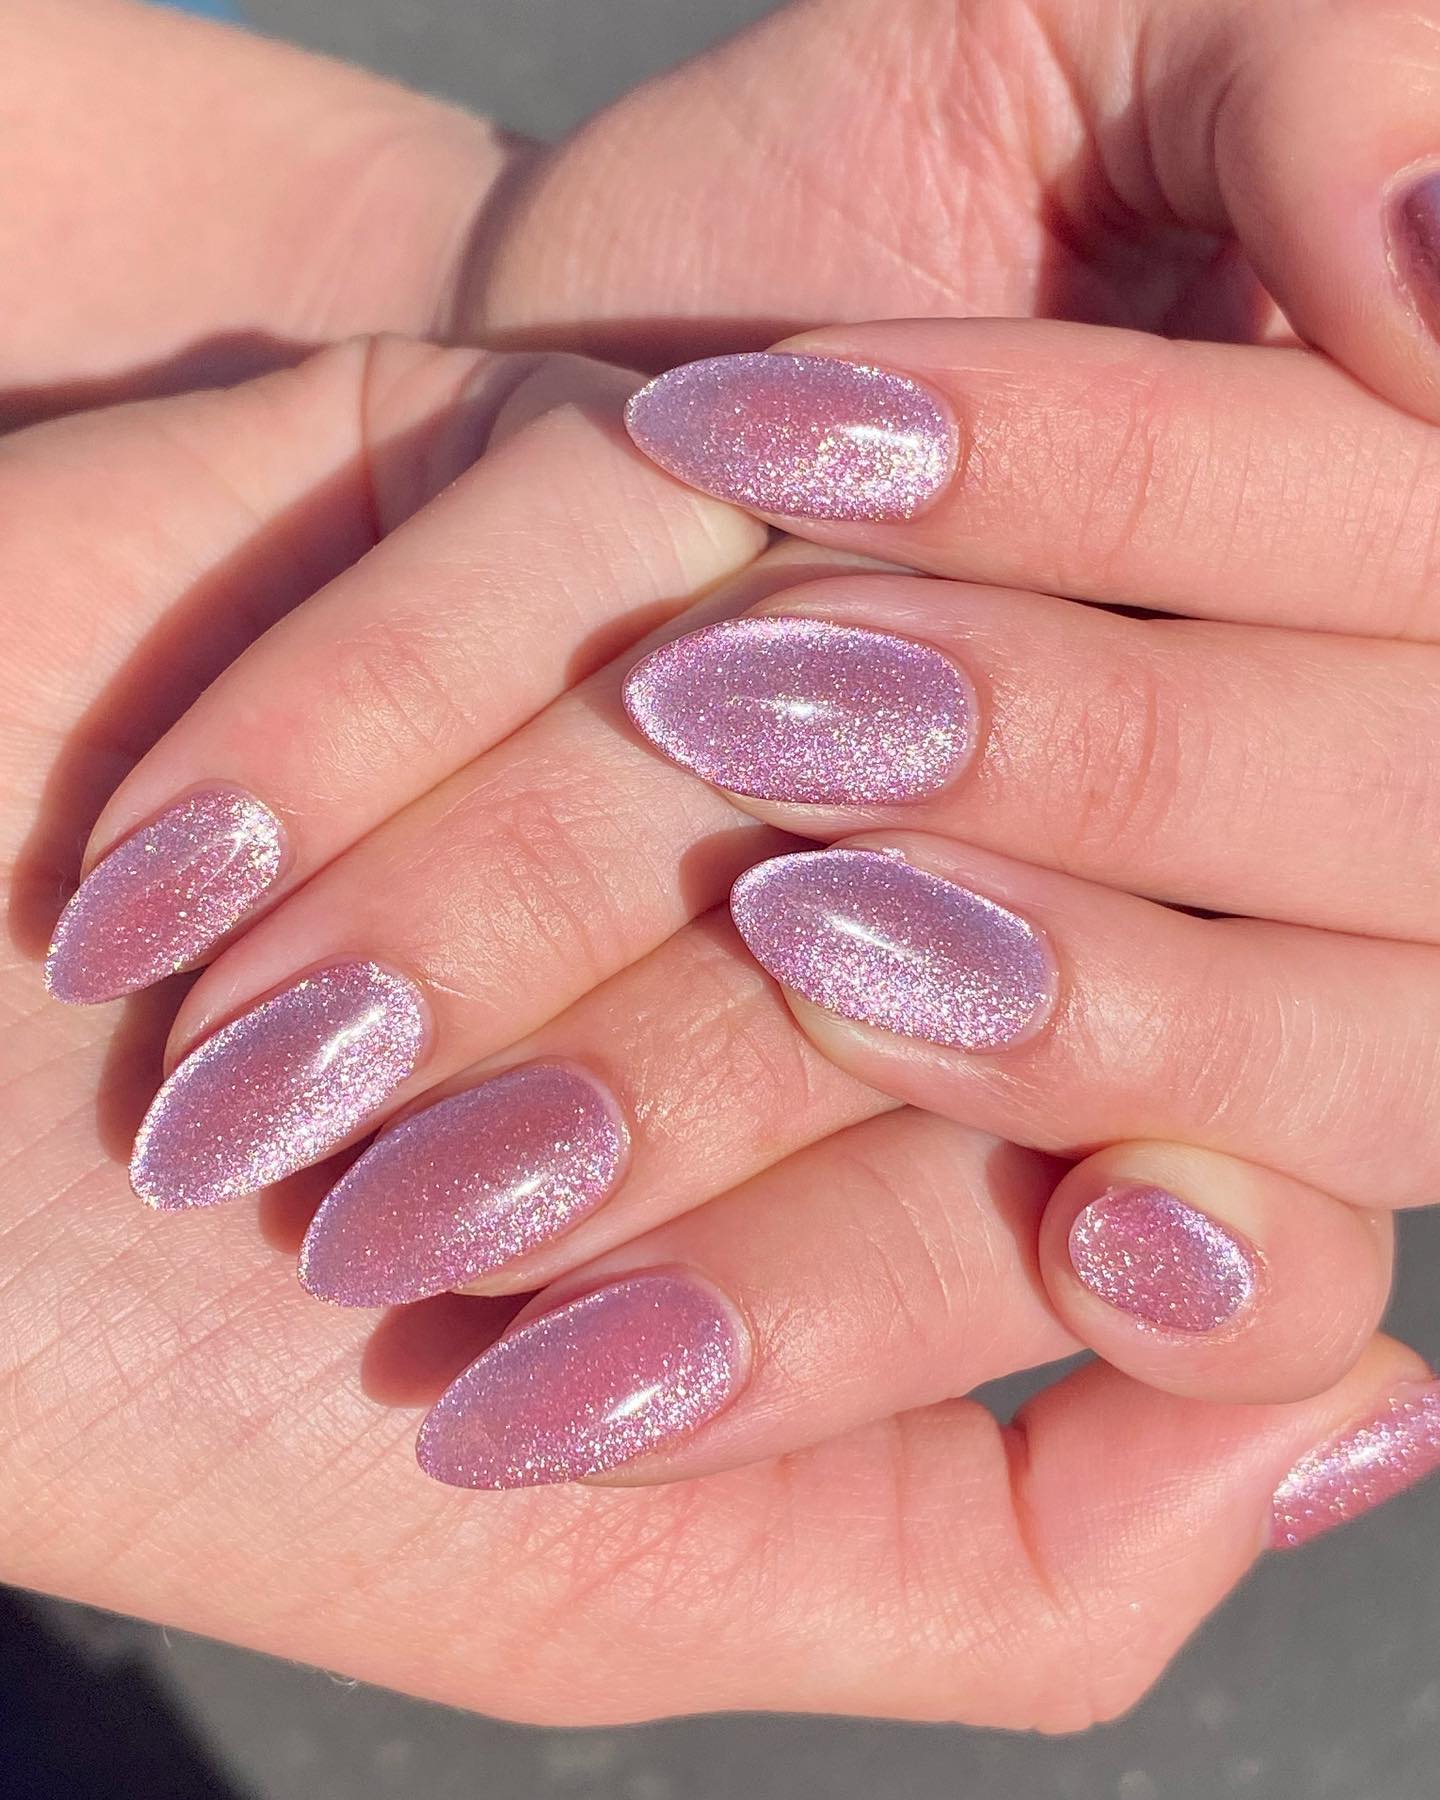
4. Frosty and wintery pink velvet nails by @nailsby.syd
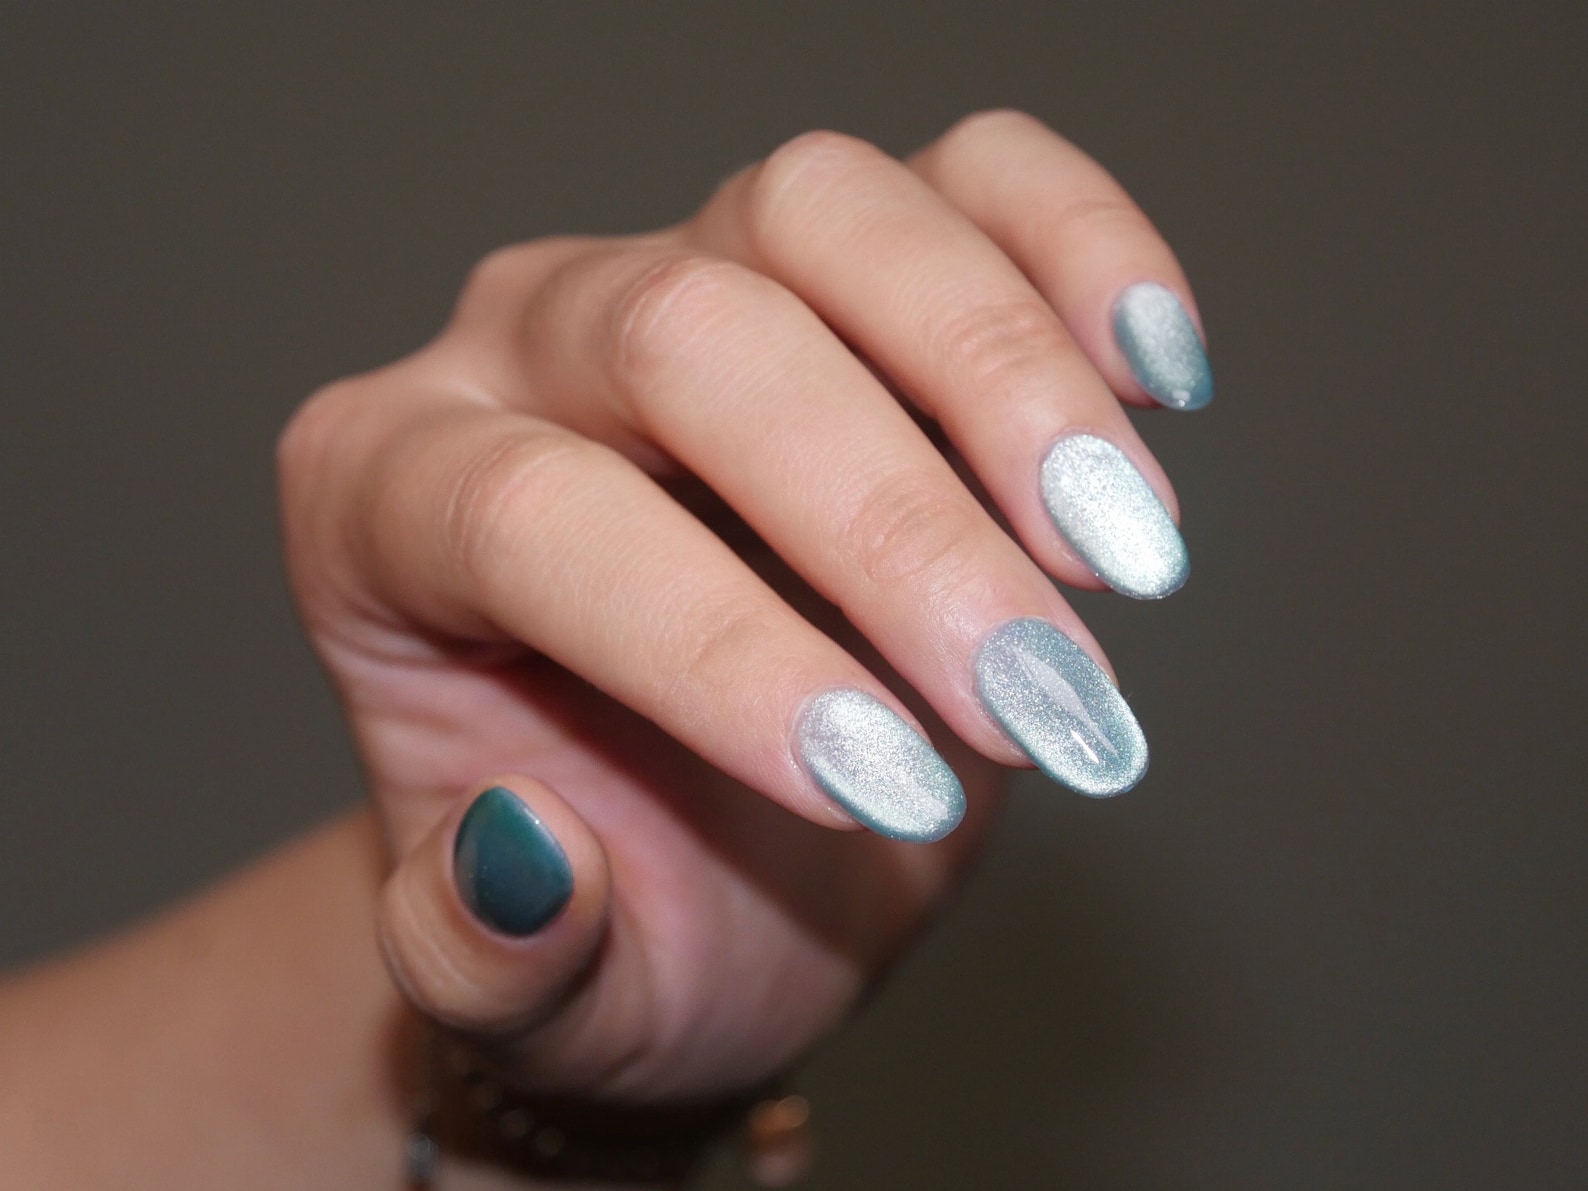
5. “Frosty ocean” UV gel from Makynail to get the velvet effect with just one product
Feeling Creative? Materials You’ll Need:
To get velvet nails at home, you’ll need just a few essential materials, must of which you probably already have.
Here’s what you’ll need to get started:
- Regular nail polish in your desired color that you will use as a base
- A velvet powder for nails in a color that will contrast with your base polish
- A small brush or applicator
- A good top coat nail polish (can be regular or gel)
- And optionally, anything else that you want to apply as additional embellishments
The only new supply you’ll probably need to buy is the velvet powder, which is pretty much a finely powderized glitter.
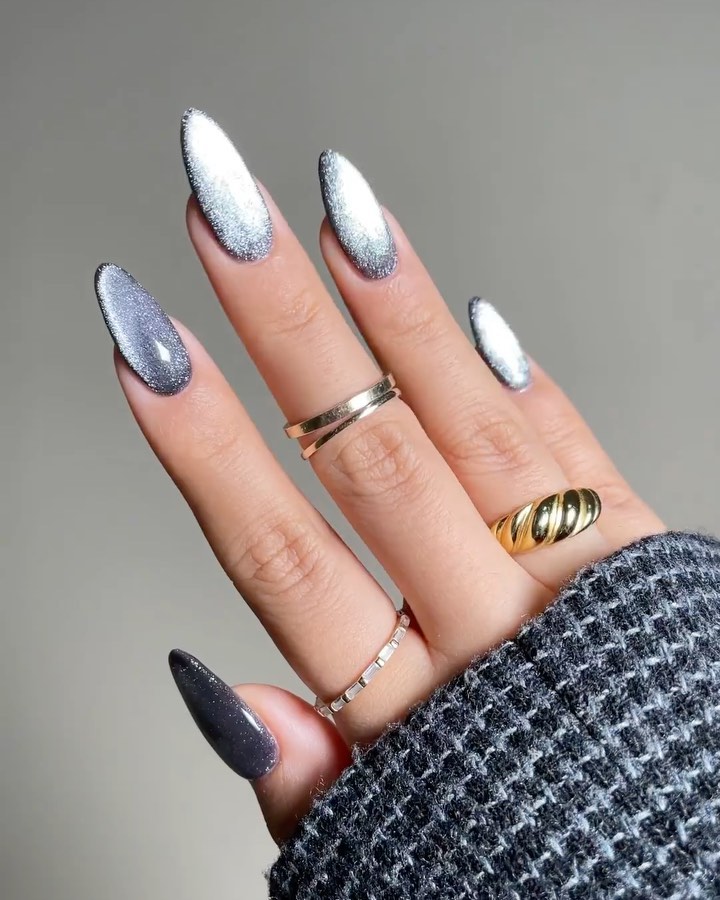
There’s a couple of Etsy shops in the sidebar that have velvet powders in nice shades. The nail tech in the reel below uses a deep berry base with a silver velvet powder.
Watch this quick tutorial from @heygreatnails on Instagram
Follow these simple steps to achieve stunning velvet nails at home:
Step 1: Prep Your Nails:
Start by removing any existing nail polish and shape your nails to your desired length and shape. Push back your cuticles and gently buff the surface of your nails to create an even canvas.
Step 2: Apply Base Coat:
Apply a thin layer of base coat to protect your nails and extend the longevity of your manicure. Let it dry completely before moving on to the next step.
Step 3: Apply Base Nail Polish:
Choose your favorite nail polish color as the base for your velvet nails. Go for two coats of your chosen color.
Allowing the first coat to dry fully before proceeding, but move on to the next step while the second coat is still wet.
Step 4: Apply the Velvet Powder:
While the second coat of nail polish is still wet, apply the velvet powder (or flocking powder) over your nails.
You can go either for a full buildup or just gently sprinkle your nails - up to you.
If you want just a plain full-coverage velvet nail, you will be done faster if you dip your nails into the powder instead of using a brush. If you want any sort of blobs or ombre effect, you’ll have to stick to the brush, though.
Allow the powder to set for a few minutes.
Step 5: Remove Excess Powder:
Using a clean small-ish makeup brush, gently remove any excess velvet powder from your nails.
Be careful not to rub too vigorously, it may affect the texture and finish of your velvet nails.
Step 6: Seal with Top Coat:
To lock in the velvet texture and provide a smooth finish, apply a top coat over your velvet nails. This will also help to protect the texture and ensure a longer-lasting manicure.
The choice is yours, but I like to use a silky top coat rather than a super shiny one.
Allow the top coat to dry completely.
Step 7: Optional Nail Art:
For those who want to take their velvet nails to the next level, consider adding some nail art. You can use nail glue to attach rhinestones, studs, or other embellishments to create unique designs that complement the velvety texture.
To maintain your velvet nails, avoid long exposure to water and activities that may cause friction or damage to the texture. When it’s time to remove them, soak your nails in warm soapy water for a few minutes to soften the texture, then gently peel off the velvet layer. Finish with a regular nail polish remover. Don’t forget to moisturize your nails and cuticles to restore hydration.
Indulge in the luxurious and textured world of velvet nails, where your fingertips become a canvas for soft and plush manicure artistry. By following our step-by-step guide, you can achieve this trendy and eye-catching look from the comfort of your own home. So, elevate your nail game and embrace the allure of velvet nails for a touch of elegance and sophistication that will leave everyone mesmerized.
Whether you opt for a solid color or incorporate additional embellishments, velvet nails add a unique and dimensional touch to your manicure, making them perfect for special occasions or when you want to indulge in a little self-pampering.
At IndieYesPls, we uphold rigorous editorial standards. This article highlights independent creators and fashion/beauty brands. Some of the links to their stores may be affiliate links. Rest assured, the editor meticulously selects these brands based on the quality of their work.
Explore more like this

Mediterranean Tile: The Trendy Twist on White and Blue Nails You Need to Try
So, summer is apparently gonna come back some day (or so they say). The season of sun-kissed skin, beach escapades, and, of course, the classic combination of white and blue...


Clean Girl Aesthetic in Makeup: 5 Looks To Radiate Your Inner Glow
I know it’s so cliché for spring, but there’s an emerging trend that embraces the calm and simplicity of soft minimalism, combining it with the beauty of classic femininity. It’s...

Beauty Magic: Embracing Your Charismatic Aura Through Eye Makeup
Everyone will tell you, perhaps well-meaningly, that true charisma shines from within. But they will also usually admit that wearing certain types of shoes or outfits makes them feel more...